Tags
Label people for follow-up, events or campaigns, with optional expiry dates for short-term tags.
Tags are labels you can put on any contact, such as “New believer”, “Easter volunteers” or “Needs a call”. Unlike groups, tags have no leaders or meetings: they are a quick way to pick people out for a message or follow-up.
Create a tag
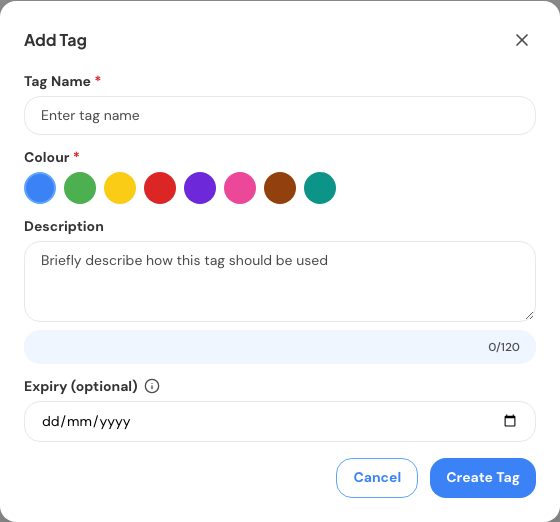
- Go to People > Tags and select Add Tag.
- Give it a name and choose a colour.
- Add a short description (up to 120 characters) so your team knows when to use it.
- Optionally set an Expiry date. The day after it, the tag is taken off everyone who has it, which is handy for event volunteers or a seasonal campaign. The tag itself stays, empty, so you can reuse it. Leave the date blank for a tag that never expires.
- Select Create Tag.
Manual and system tags
The tabs at the top filter between Manual tags (the ones your team creates) and System tags, which ChurchStack manages for you. The main system tag is First Timer, added when someone is marked as a first-time visitor. Your first-timer automation uses it.
Tag people
- From a tag’s row menu, select Add Contacts and tick the people.
- From People > Contacts, select people and choose Add Tag.
- When adding or editing a contact, choose tags in the form.
Use a tag
From a tag’s row menu you can View Contacts, Send Email or Send SMS to everyone with that tag, Edit Tag or Duplicate Tag.
Delete removes the tag from every contact and cannot be undone. The contacts themselves are not deleted.
Tell us what you were trying to do and we will help.