Your public contact form
Share a link or QR code so visitors can add their own details, then approve each submission before it becomes a contact.
Every church gets a public contact form. Visitors fill it in on their own phone, and their details arrive in ChurchStack for you to approve. It saves typing up paper welcome cards.
Set up the form
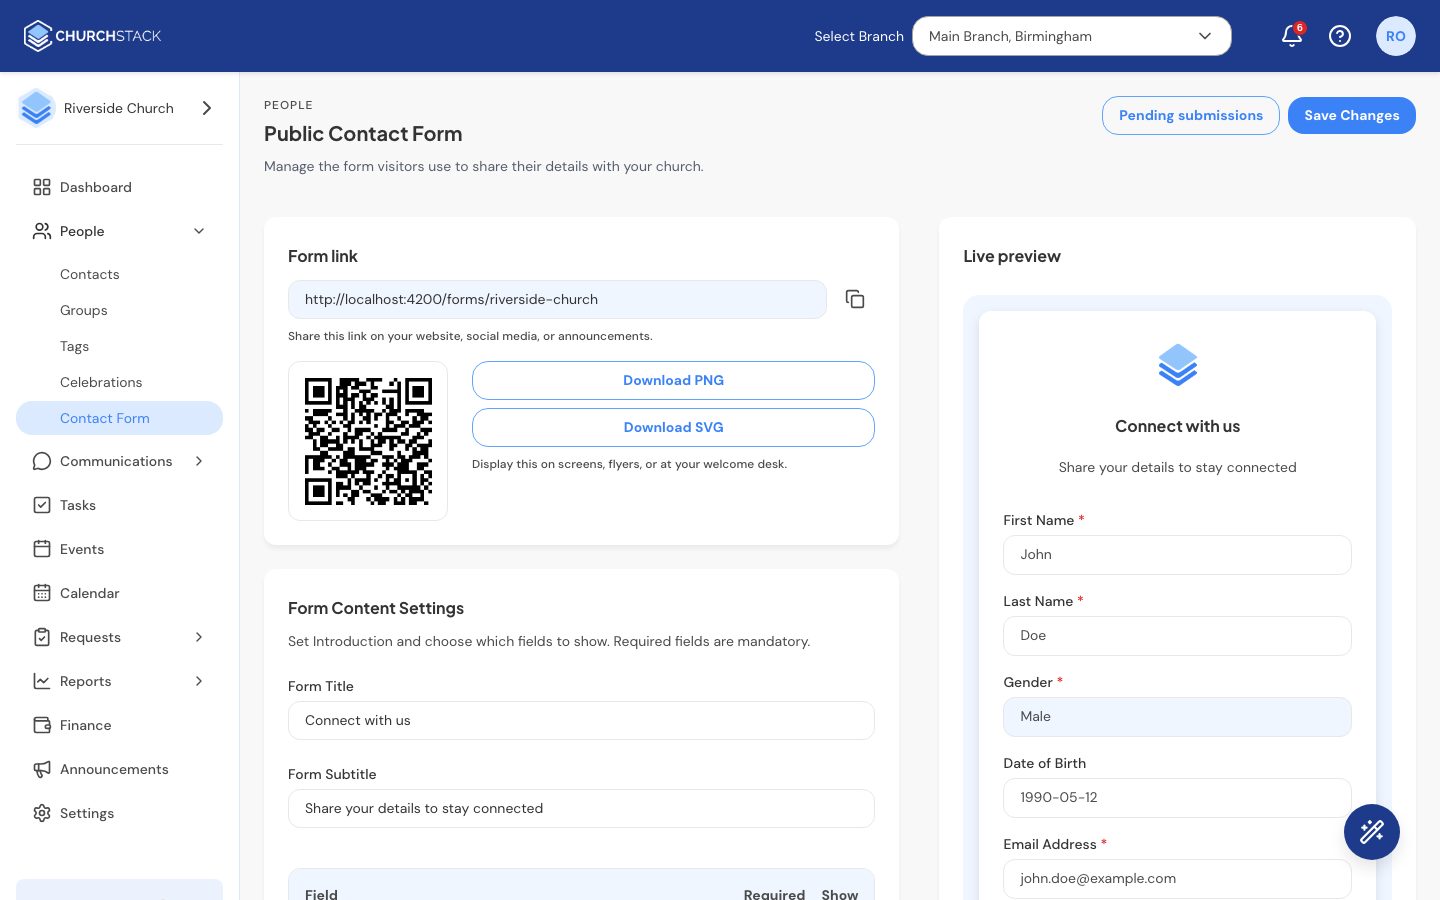
- Go to People > Contact Form.
- Change the Form Title and Form Subtitle if you like. The defaults are “Connect with us” and “Share your details to stay connected”.
- In the field list, switch on the fields you want to Show. First name, last name, gender and email are always shown and always required.
- Check the Live preview on the right, then select Save Changes. The public form shows your changes straight away.
Share it
The Form link box has the link to your form and a QR code. Copy the link into a social media post, or download the QR code to put on screens, flyers or the welcome desk.
When someone submits the form they see a thank-you message. The form tells them that submitting gives your church permission to store their details.
Approve submissions
New submissions wait for review, so nothing reaches your contacts without a person checking it.
- On the Contact Form page, select Pending submissions. The number beside it is how many are waiting.
- Check each one and select Approve or Reject. To handle several at once, tick them and use Approve Selected or Reject Selected.
Approved submissions become contacts. Rejected ones are kept in the Rejected list for your records.
Tell us what you were trying to do and we will help.